Introduction
TOSCA is widely recognized as one of the most powerful tools for achieving comprehensive end-to-end test automation. One of the crucial aspects of automation testing in TOSCA is database connectivity specifically when working with SQL Server. For TOSCA to communicate effectively with a SQL Server database, it needs a reliable connection mechanism. This is where the concept of Data Source Name (DSN) and ODBC (Open Database Connectivity) comes into play.
In this comprehensive guide, you’ll learn step by step how to Create a DSN Using ODBC Driver for SQL Server and configure it for TOSCA. This tutorial is particularly valuable for learners enrolled in TOSCA Training, those preparing for TOSCA Certification, or professionals looking to enhance their practical understanding of TOSCA Automation Course content.
By the end of this post, you’ll understand how to establish a stable ODBC connection, validate it through test data source verification, and successfully integrate it with your TOSCA project environment.
What Is a DSN and Why Is It Important in TOSCA?
Before diving into the technical steps, let’s clarify the purpose and importance of DSN in TOSCA. A Data Source Name (DSN) is a logical name that identifies a database connection configuration. It allows applications, including TOSCA, to connect to a database without hardcoding the connection parameters.
When working with TOSCA modules that perform database verifications or queries, such as TBox DB Expert, it is essential to Create a DSN Using ODBC Driver for SQL Server. This configuration enables TOSCA to communicate with the SQL Server seamlessly.
The ODBC driver serves as a bridge between the application and the SQL Server. It handles all low-level connectivity tasks, ensuring that the test automation scripts can read and validate data from the database without manual intervention.
Step 1: Access the ODBC Data Source Administrator
The first step to Create a DSN Using ODBC Driver for SQL Server is to open the ODBC Data Source Administrator (64-bit) on your Windows system. This tool helps configure and manage database connections that rely on ODBC drivers.
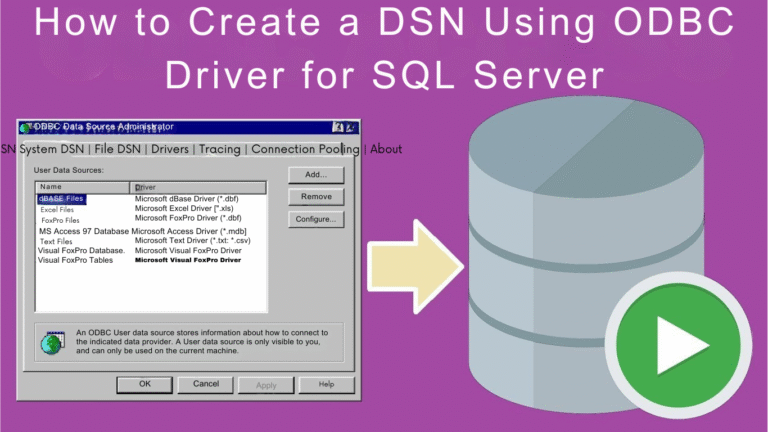
You can access it by typing “ODBC Data Source (64-bit)” into the Windows search bar. Once the window opens, you’ll see multiple tabs like User DSN, System DSN, File DSN, etc.
Navigate to the System DSN tab this is where you’ll configure the connection so it’s available to all users and services, including TOSCA.

Step 2: Add a New ODBC Driver
Once inside the System DSN tab, click on the Add button to create a new DSN. This opens a list of available drivers installed on your machine.
Select ODBC Driver 17 for SQL Server from the list. This driver is one of the most widely used and stable drivers for establishing SQL Server connections.
After selecting it, click Finish to proceed to the configuration stage.

This marks another key step in the process to Create a DSN Using ODBC Driver for SQL Server choosing the right driver ensures compatibility and reliability when TOSCA interacts with SQL Server databases.
Step 3: Configure the Data Source
A new window titled “Create a New Data Source to SQL Server” will appear. This window allows you to define specific properties of your new DSN.
- Name: Enter a meaningful name for your DSN, such as SQLServerForTosca.
- Description: Provide a short description like “TOSCA Database Connection.”
- Server: Enter the SQL Server name or IP address. You can find this in SQL Server Management Studio (SSMS) by checking your connection properties.

This configuration is a critical part of Create a DSN Using ODBC Driver for SQL Server, as it establishes the identity and target location of the database connection.
Step 4: Choose Authentication Method
The next step is to select how the SQL Server should verify the connection. The most common and secure method is Integrated Windows Authentication, which uses your system credentials.
Alternatively, you can use SQL Server Authentication, where you enter a username and password.

Choosing the right authentication ensures that your TOSCA environment connects safely to the SQL Server when you Create a DSN Using ODBC Driver for SQL Server.
Step 5: Configure Advanced Connection Options
In this step, the setup wizard allows you to enable or disable advanced SQL Server options, such as ANSI quoted identifiers, Transparent Network IP Resolution, and Column Encryption. These settings ensure compatibility between your SQL database and TOSCA’s data queries.
Leave the default settings as is unless your organization’s database administrator recommends specific changes.

Completing this configuration is part of the overall sequence when you Create a DSN Using ODBC Driver for SQL Server, fine-tuning the connection for smooth TOSCA automation.
Step 6: Finish the DSN Setup
Once you’ve verified the settings, click Next, then Finish to finalize the DSN setup.

At this point, the DSN profile such as SQLServerForTosca is ready for testing. You’re just one step away from confirming the connection.
Step 7: Test the DSN Connection
Before integrating with TOSCA, it’s important to test whether your DSN configuration works correctly. In the setup summary window, click on Test Data Source.

The system will attempt to connect to the SQL Server using the parameters you entered. If everything is configured properly, you’ll see a message indicating that the test was successful.

This confirmation ensures that you have successfully completed the process to Create a DSN Using ODBC Driver for SQL Server.
Step 8: Verify the DSN in the ODBC Administrator
After completing the setup, go back to the System DSN tab in the ODBC Data Source Administrator. You should now see your new DSN listed there, for example, SQLServerForTosca.

This verification step confirms that you have successfully executed all the configurations needed to Create a DSN Using ODBC Driver for SQL Server and that it’s now available for use within your TOSCA environment.
Connecting TOSCA to SQL Server Using the DSN
Now that you’ve managed to Create a DSN Using ODBC Driver for SQL Server, you can connect it to TOSCA. Here’s how:
- Open TOSCA Commander.
- Go to Project → Settings → Database.
- Select ODBC as the database type.
- Choose the DSN name you just created (e.g., SQLServerForTosca).
- Test the connection from within TOSCA to ensure successful linkage.
If the connection test succeeds, your TOSCA environment is now fully integrated with SQL Server. This allows test cases to access, validate, and manipulate database records during automation execution.
Common Issues and Troubleshooting Tips
When you Create a DSN Using ODBC Driver for SQL Server, you might encounter a few common errors. Here’s how to fix them:
1. “Data Source Name Not Found” Error
This often occurs when you’ve created a 32-bit DSN but TOSCA is running in 64-bit mode. Always ensure you use ODBC Data Source (64-bit).
2. SQL Server Not Reachable
Check the Server Name in your DSN configuration. It should match the name visible in SQL Server Management Studio.
3. Authentication Failed
If using SQL authentication, verify that your username and password are correct. Also ensure the SQL Server instance allows mixed-mode authentication.
4. Driver Version Conflicts
Ensure you’re using ODBC Driver 17 for SQL Server or later for maximum compatibility with TOSCA.
Troubleshooting these issues ensures your setup remains robust after you Create a DSN Using ODBC Driver for SQL Server.
Practical Application in TOSCA Projects
In real-world automation scenarios, TOSCA testers often need to validate data in SQL Server databases. For example, after executing an automated test that enters data into a web form, you can use the TBox DB Expert module to verify that the correct records were created in the database.
The ability to Create a DSN Using ODBC Driver for SQL Server gives testers a standardized, reusable connection point. Instead of reconfiguring database connections for each test case, the same DSN can be used across multiple automation projects, ensuring consistency and efficiency.
This approach also aligns with TOSCA Training objectives understanding how TOSCA connects to external databases helps testers build more dynamic and data-driven automation frameworks.
Why ODBC Driver 17 Is Recommended
ODBC Driver 17 for SQL Server provides enhanced performance, security, and cross-platform compatibility. It supports both TLS encryption and Windows Authentication, which makes it an ideal choice for enterprise-level automation projects.
When you Create a DSN Using ODBC Driver for SQL Server with this driver, you benefit from reliable data handling, minimal latency, and broader support for modern SQL Server features like Always Encrypted and Transparent Network IP Resolution.
Advanced Configuration Tips
If you want to take your setup further, consider these advanced options when you Create a DSN Using ODBC Driver for SQL Server:
- Enable Logging: Activate ODBC tracing to troubleshoot connection issues.
- Set Default Database: Specify the default schema to streamline TOSCA query execution.
- Fine-tune Timeouts: Adjust connection retry count and timeout intervals for better performance.
These configurations are not mandatory but help improve stability and traceability in complex test environments.
Best Practices for Maintaining DSN Connections
After you Create a DSN Using ODBC Driver for SQL Server, keep these best practices in mind:
- Document Connection Settings: Maintain a configuration record for easy replication across test environments.
- Regularly Test Connections: Periodically use the Test Data Source button to confirm that your DSN remains valid.
- Version Control: Align the ODBC driver version with your SQL Server version for compatibility.
- Access Management: Restrict DSN creation rights to authorized users for security reasons.
These measures ensure that your TOSCA Automation Course and real-world projects maintain a consistent and reliable connection to SQL databases.
Key Takeaways
- You must Create a DSN Using ODBC Driver for SQL Server to enable TOSCA to connect with SQL Server databases.
- Always use the 64-bit ODBC Administrator for compatibility with TOSCA.
- Verify connection settings with Test Data Source before finalizing.
- The ODBC Driver 17 for SQL Server ensures stable, secure connections.
- Once created, the DSN can be used across multiple TOSCA projects to streamline database automation.
By mastering this setup, you’re not just learning a technical process, you’re building a foundational skill required for TOSCA Certification and enhancing your ability to execute advanced test automation scenarios.
Conclusion
Establishing a reliable database connection is a fundamental requirement in test automation. Through this step-by-step guide, you’ve learned how to Create a DSN Using ODBC Driver for SQL Server and integrate it seamlessly into your TOSCA environment.
From configuring drivers and authentication methods to verifying the connection through testing, every stage contributes to building a stable bridge between TOSCA and SQL Server.
Now it’s your turn: open your ODBC Data Source Administrator and practice these steps today to reinforce your learning from your TOSCA Training journey.